How to use MkDocs to Create a Technical Documentation Site
A Comprehensive Guide to Building a Technical Documentation Site


Documentation is an essential aspect of the software engineering process. As you work on any project, documentation is really crucial. Software documentation is a way for software engineers and programmers to create, maintain, and share information in formal writing about the process they use in designing, developing, or deploying a product.
Writing clear and concise documentation can be difficult, but thankfully, MkDocs has developed a very effective method of doing so. MkDocs is a fast, simple, and downright gorgeous static site generator that's geared toward building project documentation.
This article is a comprehensive guide on how to use MkDocs to write technical documentation.
Documentation and its Importance in Software Development
Documentation is a crucial tool that serves as a guide for developers who are new to a project, providing them with the information they need to get started. It fosters collaboration and teamwork by enabling effective communication between testers, users, designers, and developers. With its help, all stakeholders can work together more efficiently towards a common goal.
Comprehensive documentation can help during troubleshooting and help developers implement the right solution. Documentation can serve as a tool for seamless onboarding and help developers build upon existing work.
An Overview of MkDocs
The MkDocs theme's components, which are widely used, make your documentation look good without any additional work. MkDocs is a way to write project documentation with Markdown. Documentation source files are written in Markdown and configured with a single YAML configuration file. To obtain more information, read the introductory tutorial or consult the User Guide.
Prerequisites
In order to effectively use MkDocs, you should be comfortable with the following:
Virtual Environment: Construct and work within a Python virtual environment.
Package administration: When installing Python packages, use pip to manage packages and execute your own modules.
Markdown: Learn the fundamentals of markdown, its structure, and recommended practices.
An IDE
GitHub Repositories: Create and update a repo on GitHub to host your documents.
NB: It's perfectly fine if you don't have all the required knowledge before starting this tutorial. You can always learn more by diving in and getting started. If you run into any problems, do not hesitate to pause and look over the relevant resources.
Installation
These steps will help you set up Mkdocs on your local machine and run its development server.
MkDocs setup
MkDocs requires Python and pip to be installed. To check if Python is installed on your computer, type the following command at the command prompt:
python --versionThe version of Python currently installed on your computer will be displayed.
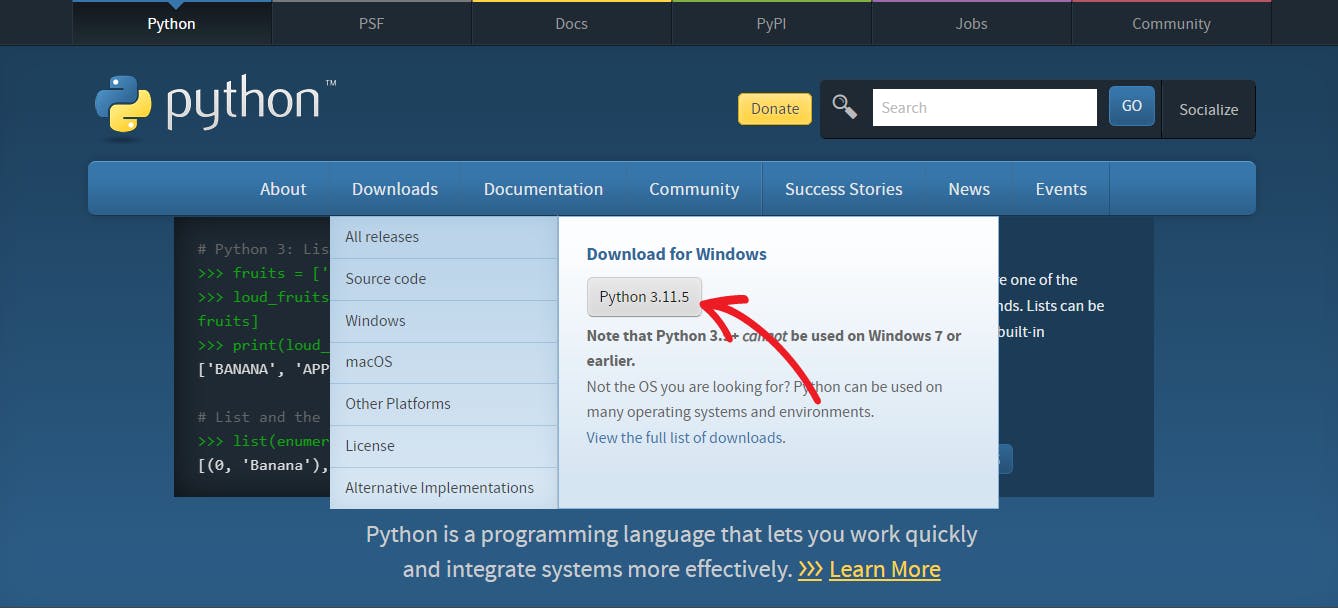
If you currently don't have Python installed on your computer, go to Python.org and download an installer appropriate for your system.
- To use mkDocs, you'll need pip. If you have pip, ensure it's updated, then install mkDocs. If you don't have pip, download get-pip.py and run the following command to install it.
python get-pip.py
Installing MKDocs
To install MkDocs, simply open your command prompt and enter this command.
pip install mkdocsCreating a new project:
- Run the following command in your terminal, replacing PROJECT_NAME with the name of your project.
mkdocs new PROJECT_NAME
cd PROJECT_NAME
You should find two items: a file named
mkdocs.yamland a folder nameddocs. The folder contains a single markdown file calledindex.md.
To access the documentation, simply open your terminal and type in the following command:
mkdocs serve
To access your documentation through the browser, please navigate to the
http://127.0.0.1:8000/
You will see a default MKDocs page when you access the IP address.
Overview of the MKDocs File Structure
Before proceeding, it's crucial to review the initial project structure.
 mkdocs.yml    # The configuration file.
    docs/
        index.md  # The documentation homepage.
        ...       # Other markdown pages, images and other files.

Here is a breakdown of what each file means:
MY-DOCSThis is the name that was given to the project. You can decide to name it anything of your choice..docs/This folder is designated for storing technical documentation, written exclusively in markdown format, within the selected folder.mkdocs.ymlThis is the configuration file for your MKDocs project. It is written in YAML and controls various aspects of your documentation, including the site name, theme, navigation, and more. You can easily customize your project by modifying this file according to your preferences.
N/B: These commands will assist you in navigating through the process of building the documentation site.
mkdocs new [dir-name] - Create a new project.
mkdocs serve - Start the live-reloading docs server.
mkdocs build - Build the documentation site.
mkdocs -h - Print help message and exit.
Editing the Configuration File
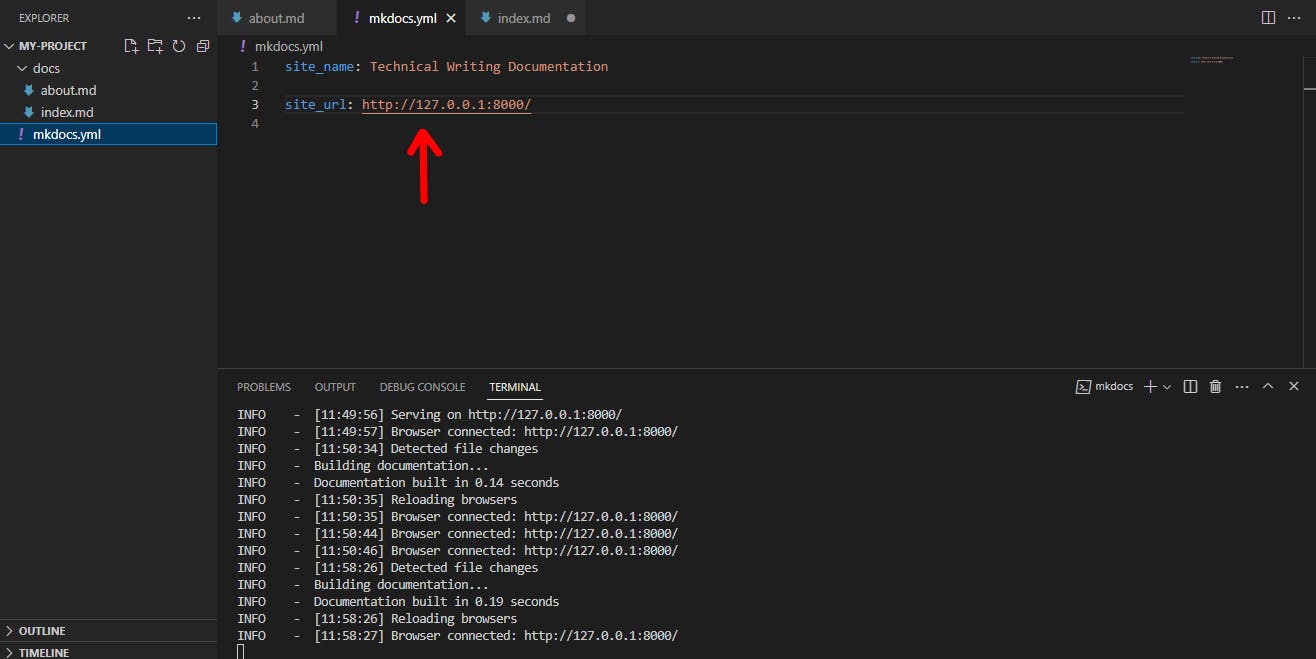
As I mentioned earlier, thismkdocs.yaml is the configuration file. In this file, you can customize the site.
Clicking on
mkdocs.yaml, this will open the configuration file where you will configure your document to yourIn this case, I worked on a technical writing documentation site, so I changed the site name to Technical Writing Documentation. You can also add your site URL, as seen in the image above.
Navigate to the Docs folder and create new files. Each file should have the
.mdextension.

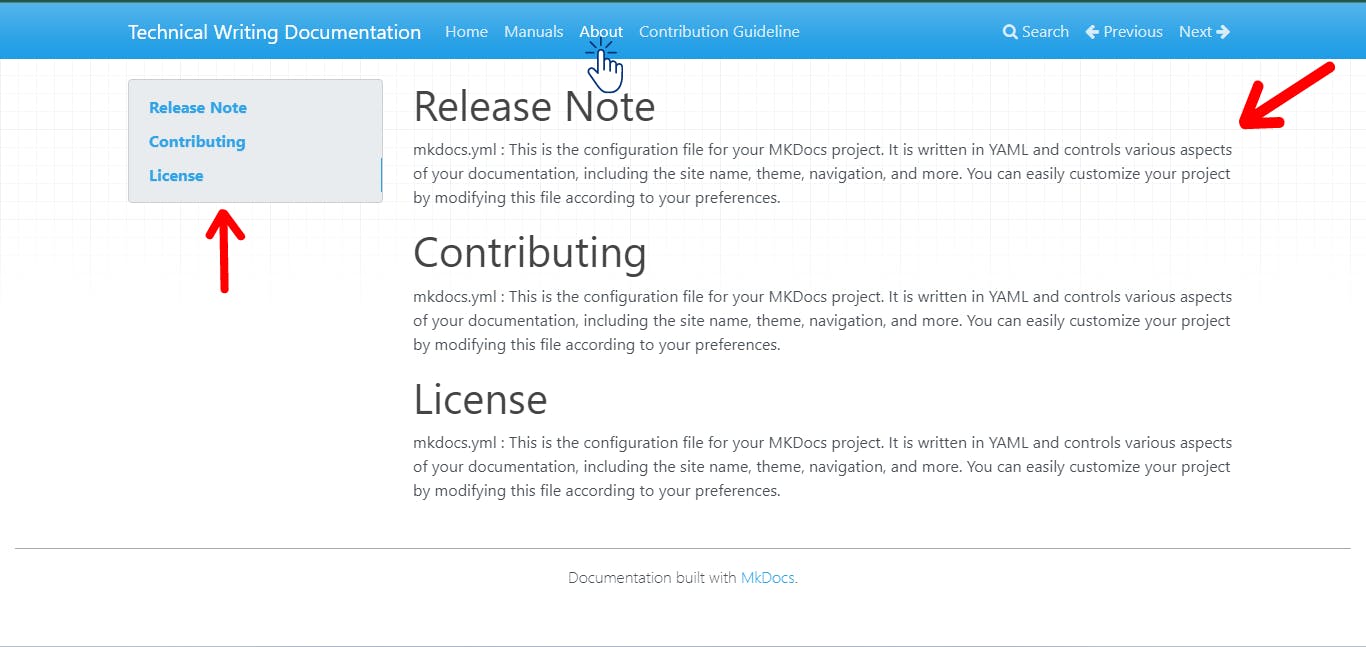
Next, we will add a navigation setting to the mkdocs.yml. Write the following in the mkdocs.yml.
nav:
- Home: home.md
- Manuals: index.md
- About: about.md
- Contribution Guideline: Contribution.md
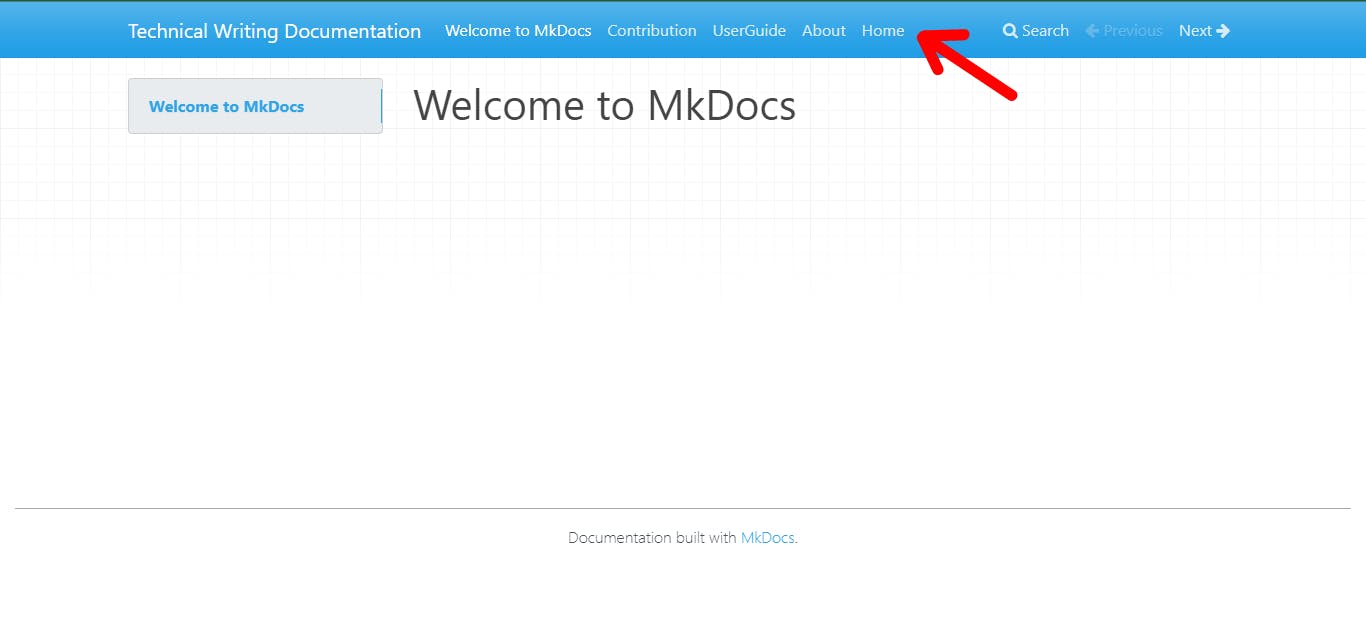
As soon as the files are created on the docs, navigate to your browser, and you will notice that each of the .md files are already placed at the top.
Navigate to the about.md and add a markdown file.

Navigate to the browser, and you will see the changes made.
Theming your documentation
If you are using MKDocs to create documentation, you have the option to customize its appearance by using a theme. There are two ways to do this:
It's important to note that you must choose one of the two available themes, which are 'MKDocs' and 'readthedocs'.
Alternatively, you can use a third-party theme of your choice.
To change the theme, simply make changes to the theme setting in your file.
  theme:
    name: readthedocs
When using a third-party theme, specify its name as it is not provided by the platform.
  theme:
    name: my_custom_theme
Third-party themes can be used to install themes on your device.
pip install mkdocs-my_custom_theme
You can specify the name of the theme in your file.
Markdown
Markdown is a great choice for technical documentation. The documentation source files are written in Markdown and configured using a single YAML configuration file. Markdown is similar to HTML in that it is also a markup language.
In this section, we will explore the basic syntax of Markdown, which can help you create outstanding documentation. We use a specific syntax in Markdown to denote headings, lists, bold text, and other formatting styles. To start writing using Markdown, save your file with the .md extension and see the output in real-time.
| Result | Markdown Syntax |
| Heading 1 | # |
| Heading 2 | ## |
| Heading 3 | ### |
| Italics | *italics* |
| Bold | *bold* |
| Strike | ~insert text~ |
| Block quote | > |
| Links | [link name](link.com) |
| Unordered list | *List item* |
| Code Block | `insert code here` |
In VSCode, there are language support options available for a variety of programming languages.
Deploying your Documentation
To complete the process, we will be hosting our documentation on GitHub Pages. MKDocs offers a command to build the documentation, which will generate a folder named "site". You have the option to upload your folder to GitHub by either using the command line or pushing it directly.
Follow these steps to build and deploy your documentation via MKDocs.
After completing the writing and editing of your documentation, build your site using the command below.
mkdocs buildThis command will create a directory named
[site]source that contains the source code for your documentation's static site.You can choose to host your documentation on any web hosting platform, such as Vercel or Netlify. This allows others to easily access your work by clicking on the link to the hosted pages.
Conclusion
In this article, we have discussed the process of installing MKDocs, editing the configuration file, styling your documentation, and writing with Markdown. We have also covered how to deploy your documentation to GitHub.
By using MKDocs to build your project documentation, you can write in Markdown, which makes creating excellent documentation a lot easier.
If you are interested in learning how to further customize your documentation or explore other mkDocs options, you can visit their website.